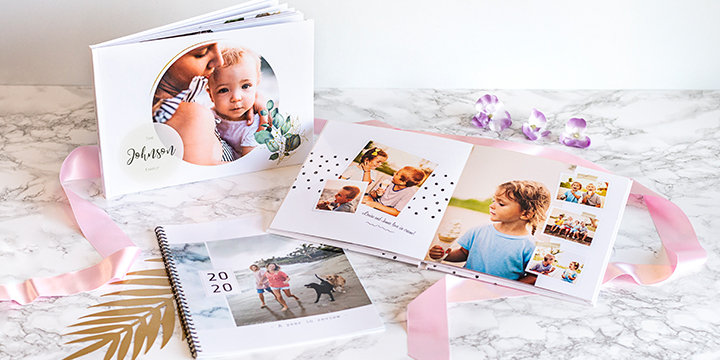
Learning to read should be fun and something you can learn through play at home! One way to do this is by creating your very own ABC book. A self-written children’s book where your child learns the alphabet through pictures of themselves and the people, pets and things they love! All you have to do is make sure you have lots of great pictures! Then, just follow this simple step-by-step guide on how to make a personalised ABC book using Smartphoto’s photobooks!
What you’ll need:
- An alphabetical list of the words you want to represent each letter.
- Digital photos of your child, family, friends, toys, or anything else you think they’ll be happy to see when you flip through the book together.
- A computer or tablet.
What to do – 5 steps:
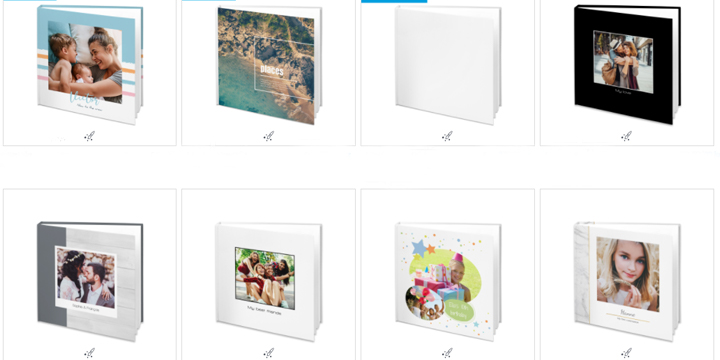
1. Choose the size and format of your ABC book
When we created the ABC book for this DIY video, we used a Large photobook (square with a hard cover and a photo). This book is 21 – cm × 21 – cm, which is the perfect size for a children’s book. For large and XL photobooks, you can also choose between 3 types of paper: standard, glossy, or matte. When you create a large photobook, what we call “lay-flat binding” is included. This means the book lies completely flat when you have it open, so it’s very easy to browse. You can read more about all the options you have when making a Smartphoto photobook here. Of course, if you want to make a smaller version of your ABC book, you could choose the medium Photobook.
2. Write your personalised ABC list.
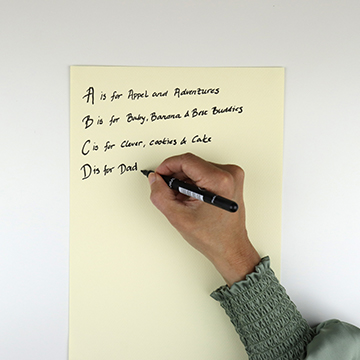
Start by preparing a structure for your book. Here, you decide which words you want to represent the letters. You can either start from the photos you already have and use them for the appropriate letter, or you can make your ABC list and then find the right photos to accompany it. At the bottom of this post, we’ve given our suggestions for the ABC list. Either use it for inspiration, or copy it!
3. Start creating your ABC book!

Now the fun begins! Creating and building your own ABC book is both easy and fun. You create the book using Smartphoto’s photobook editor directly online. You don’t need to download any software; everything is done directly on Smartphoto’s website. So, if you register an account at Smartphoto, you can pause the creation of your book and continue whenever you like, wherever you are.
4. Start by choosing a design
The easiest way to create your ABC book is to start from an already finished design template. There, the layout and color choices are already made so that your book will look professional. There are lots of lovely colorful designs to choose from at Smartphoto. We used this beautiful one with stars and circles in pastel colors. Even if you go with a ready-made template, you can still change and adapt each page to make your perfect ABC book.
5. Make your ABC book
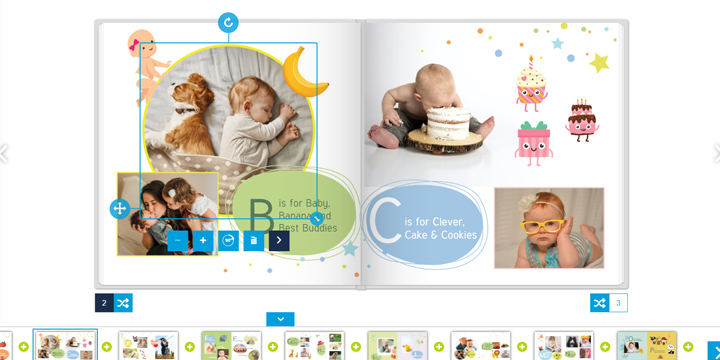
Once you have chosen the size, format, cover photo, and design of your book, the fun really begins; you can start creating your ABC book! With Smartphoto’s editor, there’s untold possibilities! For example, you can:
- Choose the font, size, and colour of your text
- Add symbols and icons that reinforce your message (choose from several hundred!)
- Resize/reshape the pictures you place in your book and add frames
- Change the background color for the pages (or select one of the available patterns)
- Choose ready-to-go layout suggestions or create completely new ones from scratch!
We chose to make one page per letter, but you can decide for yourself how you want to do it. Make your book the way you think your child will like it. Learning to read should be fun!
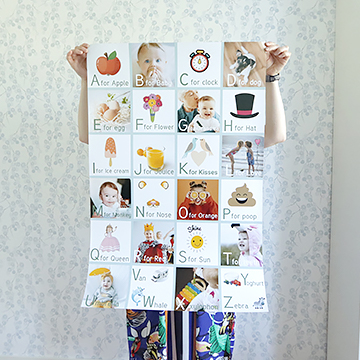
Suggestions for your ABC list
To create a fun and educational ABC book, we recommend that you mix verbs with nouns. That way, you can mix lovely pictures of your child along with symbols or pictures of animals and things they like.
- A is for Apple and Adventure
- B is for Baby, Banana or Best Buddies
- C is for Clever, Cake or Cookies
- D is for Duck or Dog and for Dad
- E is for Elephant, Eggs and Eating
- F s for Friends, Family and Flowers
- G is for Grandma, Girl, Giraffe
- H is for Hat, Heart and Horse
- I is for Ice cream
- J is for Juice
- K is for Kisses
- L is for Lion, Lego, Laughter and for Leaf
- M is for Music, Mum and Monkey
- N is for Nose
- O is for Orange and Octopus
- P is for Pirate, Panda and Poop
- Q is for Queen
- R is for Robot and Rabbit
- S is for Smile, Sun, Start and for Sand
- T is for Trains and Teeth
- U is for Unicorn and Umbrella
- V is for Violin or vegetables
- X is for Xylophone and Fox
- W is for Water and Whale
- Y is for Yogurt and for You
- Z is for Zebra and Zoo
Other ways to teach your child to read

ABC Prints in a Box – perfect for holidays or long journeys!
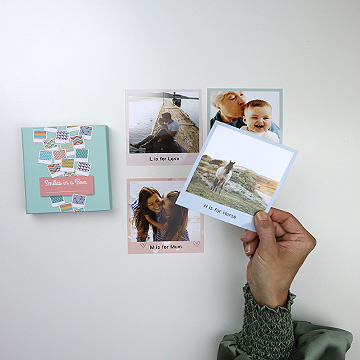
A perfect way to practice ABC on the go. Create ABC cards by ordering Prints in a Box. You can still use your own images and text and change the background. So, while learning to read, you and the little one can talk about at the pictures and the memories they evoke. A perfect pastime for a long trip.
ABC poster – stylish decoration for their room
Finally, you can even choose to create a poster. There are many sizes to choose from. We chose to make a really big 60 cm × 90 cm poster. If you choose “blank design” you’ll be able to decide the number of frames in your collage and add symbols, text, and colours.
So, we hope you found these tips interesting and that they’ve given you some ideas on how to teach your child to read in a fun and easy way!
Please share the wonderful things you create with your photos!
We love to see the things you create with your photos! So, feel free to share them on Instagram! Use the hashtag #mysmartphoto, where our customers inspire each other to create something fun and beautiful using their photos!
Do you have any other ideas for interesting and fun ABC products – Tell us in the comments below.